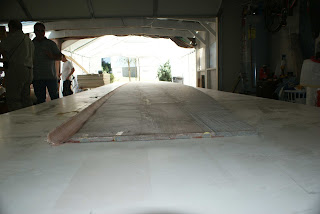
The next big step is to pull the shape into the panel. It is hard to believe we are starting with a flat panel and will end up with a "half hull" shape in just a few steps. We have our flat panel on the table, deck edge radius molded in, glass and gel coat on the outside of the panel and glass and foam on the inside of the panel. Ready for the next step.
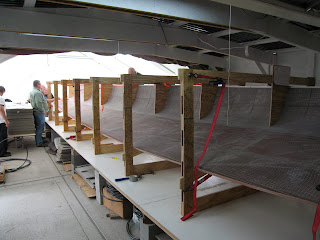
Here are the forms we will be using. They are made out of 3/4 inch material, lumber or cut pieces of chip board cut to 4 inch wide strips, some eye bolts and wing nuts and our patterns. The pattern shape is provided by Derek and you just have to cut them out. There is a diagonal support in the framing that will be used to hold the panel at the right angle.
You will probably need some help here. We have to raise the panel up and install it in the frames. The panel is not heavy but it is wiggly and you do not want to bend it or break the deck edge radius or the dart cuts.
All the frames are numbered to correspond to the positions marked on the panel. Once you get a couple of frames up to hold the panel, you can take some time to align everything.
It helps to have feet on the frames so they stand up by themselves.
This is the time to do all the little adjustments.
We now have all the frames in place and all the adjustments for shape are complete.
Here is a view of the frames from the bow. You may notice that the diagonal support is not at the same height in all frames. It is lowest in the middle of the panel and highest at the bow of the panel. This gives us the fore and aft shape of the hull.
Derek is now attaching the straps to the frames. Notice the strap starts at the bottom of the frame at the shear line of the hull and goes around the panel and back to the top of the frame. We want the pulling force to be applied to the top of the panel as it sits in the frames. The ratchet is at the top of the frame where it will be easy to operate and provide this top bending force. Notice the full length batten is in use again. The batten in this position distributes the bending force on all sections of the lower hull and contributes to a fair curve.
The straps hook through the eye bolts in the upper and lower corner of the frame.
As you can imagine, there is a considerable amount of force applied to accomplish the forming of the panel. The deck edge radius is next to the frame edge and all this force is applied to it. It is not strong enough to withstand this pressure so to help it survive the strain, we screw it to the frame work close to the foam. Two screws applied here on each frame will prevent the deck edge radius from being broken or deformed.
All the straps are in place, all the adjustments made, so let's get on with it.
Start at station 0. Take up the slack in the straps and then take a couple of clicks. Go to station 1 and do the same. Do this all the way to the stern. Go back to the front and take a couple more clicks in the strap. Work you way down to the stern, taking the same number of clicks at each station. By doing this in a regulated manner, no sudden pressures are applied on any part of the panel and you develop a fair curve as the hull bends into position.
You will notice that you are bending the hull to come up snug to the pattern that is attached to the frame. The bottom end of the pattern starts the bend in the panel and you pull the panel all the way to the top of the pattern.
You can see the outside of the panel taking shape. Notice the gel coat, nice and smooth. No long drawn out fairing needed here. How many hours will this save you?
But wait! Something is not right. Things are creaking and making noise. It sounds like two things are trying to fit in the same space. Derek says to look at the darts. As the panel takes shape, the full length batten allows the pieces between the dart cuts to move as they slide into shape. As two of them come together, there is not enough room for them to move so we must open up the darts a bit more. You do not want to open them too much as this is an area that will have to be filled later. A little jig saw work is all that is required.
The panel is now pulled into position. You can see that the pattern has shaped the bend into a fair curve all along the hull bottom. The hull is touching the pattern at the top and bottom and alone the sides nice and snug.
But what is this? the foam is not even on the inside. There are dart cuts between the frames and patterns and the pressure is not applied exactly even all along the panel. To eliminate this unevenness, we will have to shim up the outside of the panel. This is easily done with bits of wood placed between the straps on the outside of the curve until all the foam is even on the inside.
Well, that just about does it. We have one more step to do and that is glass the inside of the hull.


No comments:
Post a Comment