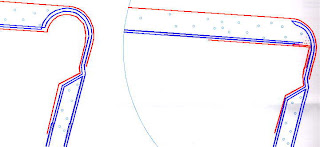
Click on a picture for a larger view.
OK, after we have constructed the table to our satisfaction, we have to lay out all the material to make a panel.
We first have to make a template out of non stretchy material, something like Mylar or anything that will not tear easily or absorb moisture and change shape or size. This template is made from a set of offsets provided by Derek Kelsall.
A set of offsets contain all the measurements for the hull shape. There will be a center line and a design water line and a shear line and all measurements will apply to these lines.
This is what a table of offsets looks like. This is not the table for this project, but you get the idea.
Here is the template laid out on the table. You can see the center line, some station lines and the upper and lower tangent lines. The left edge of the template is the sheer line. On the right side of the template you can see the dart lines in red.
On this next picture you can see the center line, bow profile, first station line, marked O, and the upper and lower tangent lines.
Before we go too much further, we should talk about this interesting device.
This is how we make the deck edge radius form which allows very easy mating and attachment of the deck to the hull sides. This template is made up by covering a 3 X 3 inch angle of aluminum with packing tape as a release agent. Then we cover the inside of the angle with a couple of layers of 10 oz glass and resin. After it cures, we remove the template from the angle. We now have a 3 X 3 angle made out of glass. We fill the inner section of the angle with a mixture of micro balloons or talk and resin and press it up against a 6 inch diameter piece of PVC pipe that is also covered with wax or a release agent. Removing the pipe after it all cures, leaves you with a template for the deck edge radius. You will need varying lengths of this template so you can make a few at 8 feet long and join them along the sheer edge as you need them.
This is the way the deck and the hull sides go together. You will have to trim one radius to fit the other and then you can glue the two edges together with a modern adhesive. No bolts-no leaks.
Here we are rolling up the template after placing the deck edge radius former in the foreground, The form for the stern rebate on the left of the picture and you can see a dotted outline at the top of the picture that is the bottom edge of the panel.
Now we can see the layout a little more clearly. Deck edge radius former in the foreground, stern rebate template on the left. The blue tape pieces show the outline of the panel.
Here we are preparing for the gel coat to be put down. We have the deck edge radius former on the left, the bow rebate template at the bottom of the picture and the solid blue lines are the edge of the gel coat area. Again, the dotted blue line is the extent of the bottom of the panel.
The bow and stern rebates are to facilitate forming the bow and stern once the two halves are put together. These rebates must be cut into the foam as well.
The gel coat is being rolled on the waxed surface of the table. Since this is the first layer of our panel, it will be on the outside of the hull. This one operation saves many hundreds of hours of tedious sanding and fairing the hull to obtain a smooth finish on the hulls of a 42 foot catamaran.
We want to remove the tape before the gel coat gets too hard as this will give us a nice crisp edge. If you wait too long, you will get a ragged edge which sort of ruins the whole idea anyway.
You can see by the dotted outline of the panel, there is a considerable area that does not have gel coat on it. This area will be under water and gel coat is not used under water.
Look at that nice clean edge. Tape removed at just the right time.
OK, time for the first layer of glass.


No comments:
Post a Comment